
Create your first form (step-by-step)
-
Login to WordPress Admin
-
Visit
https://your-site/wp-adminand sign in with your admin account.
-
-
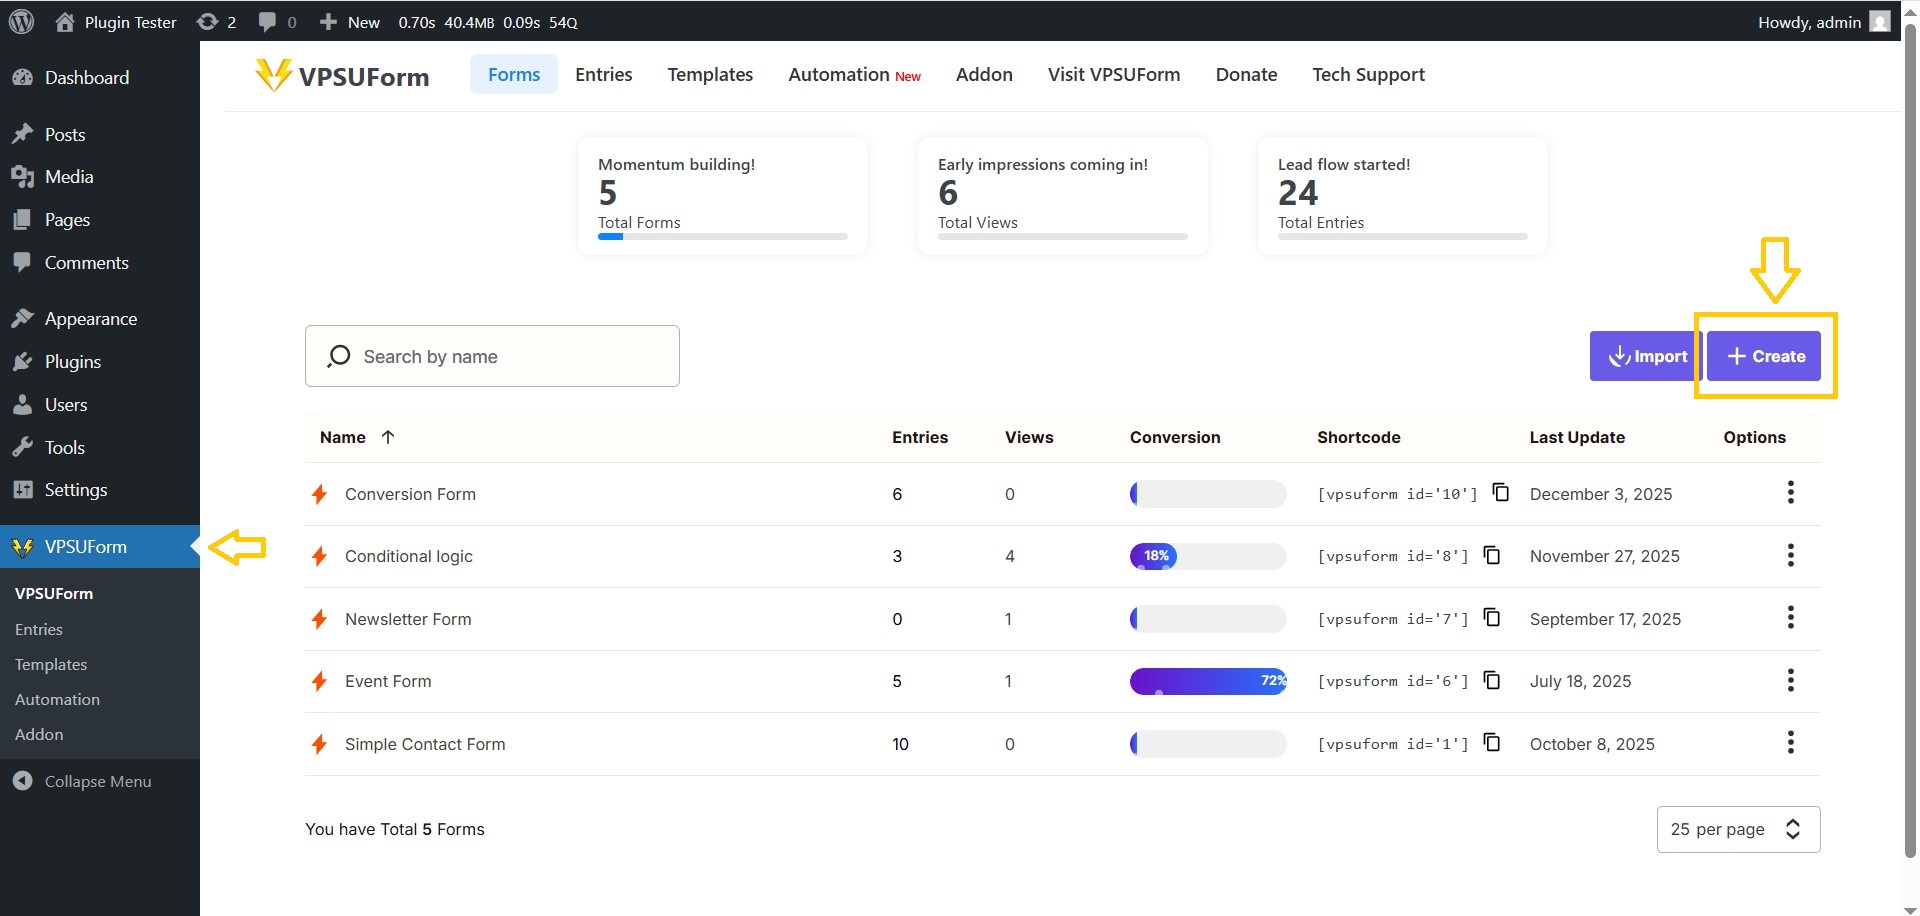
Open VPSUForm → Add New Form
-
In the left admin menu click VPSUForm then Add New Form.
-
-
-
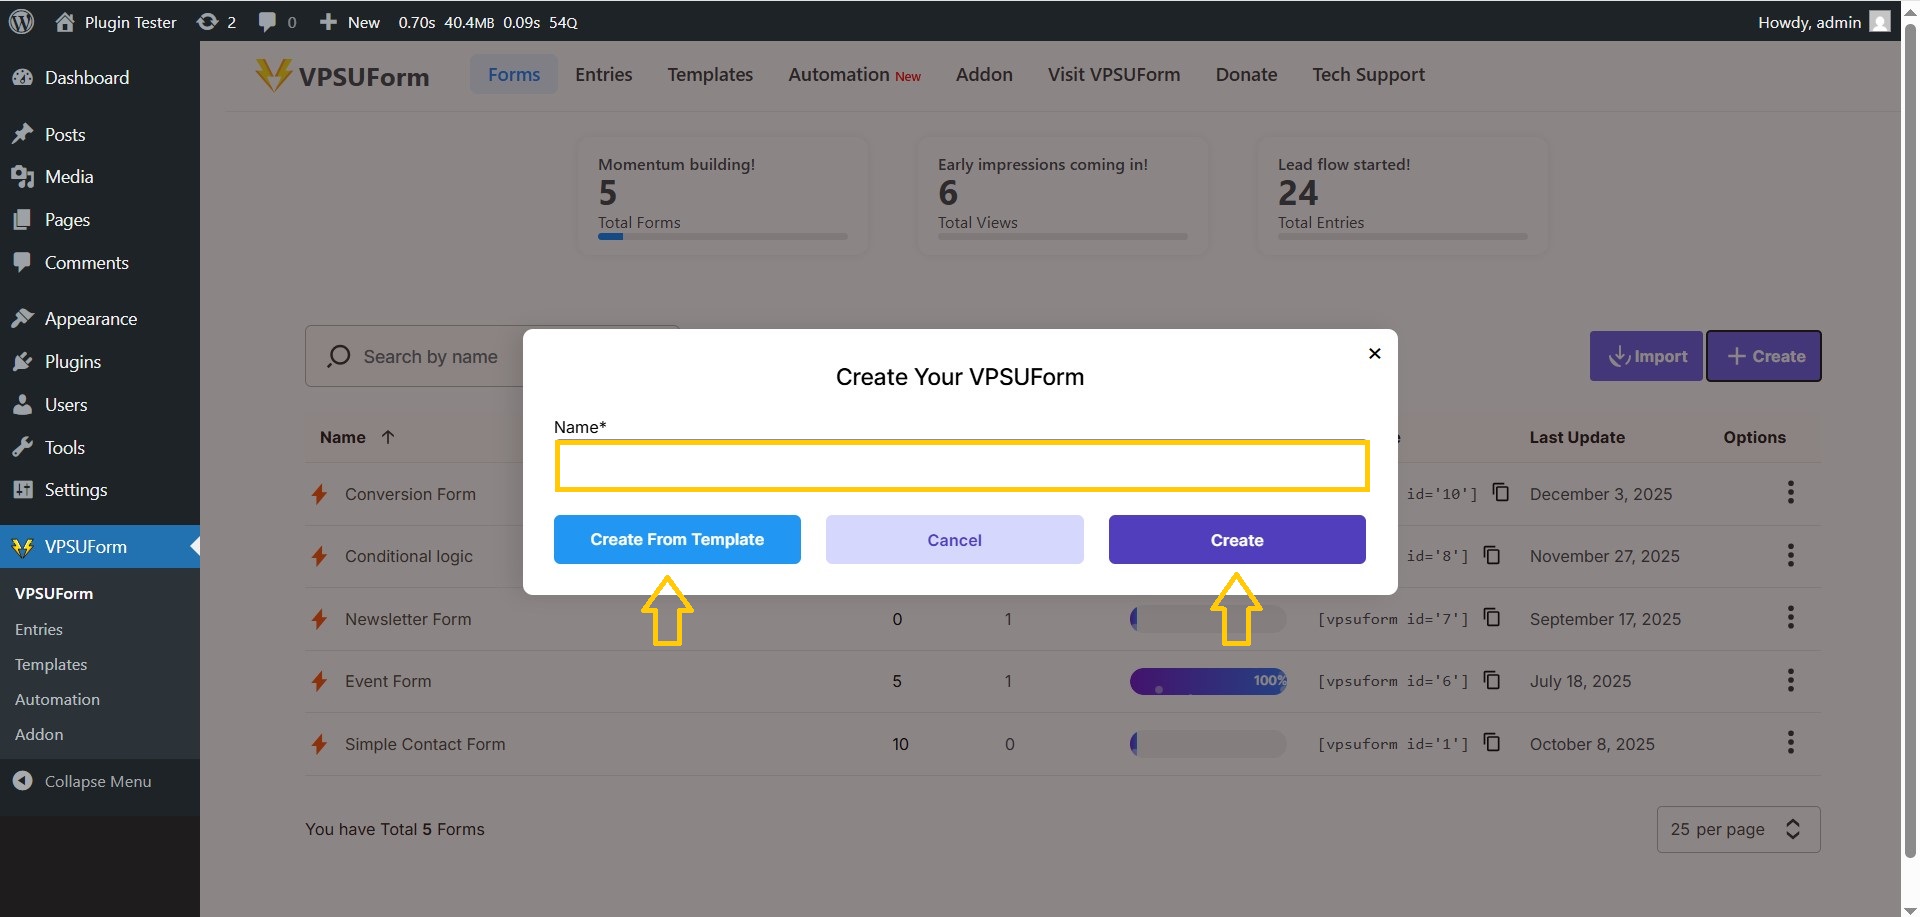
Enter form details
-
Form Title: e.g.
Contact Us -
Template: choose Blank Form or Contact Form if templates are visible.
-
-
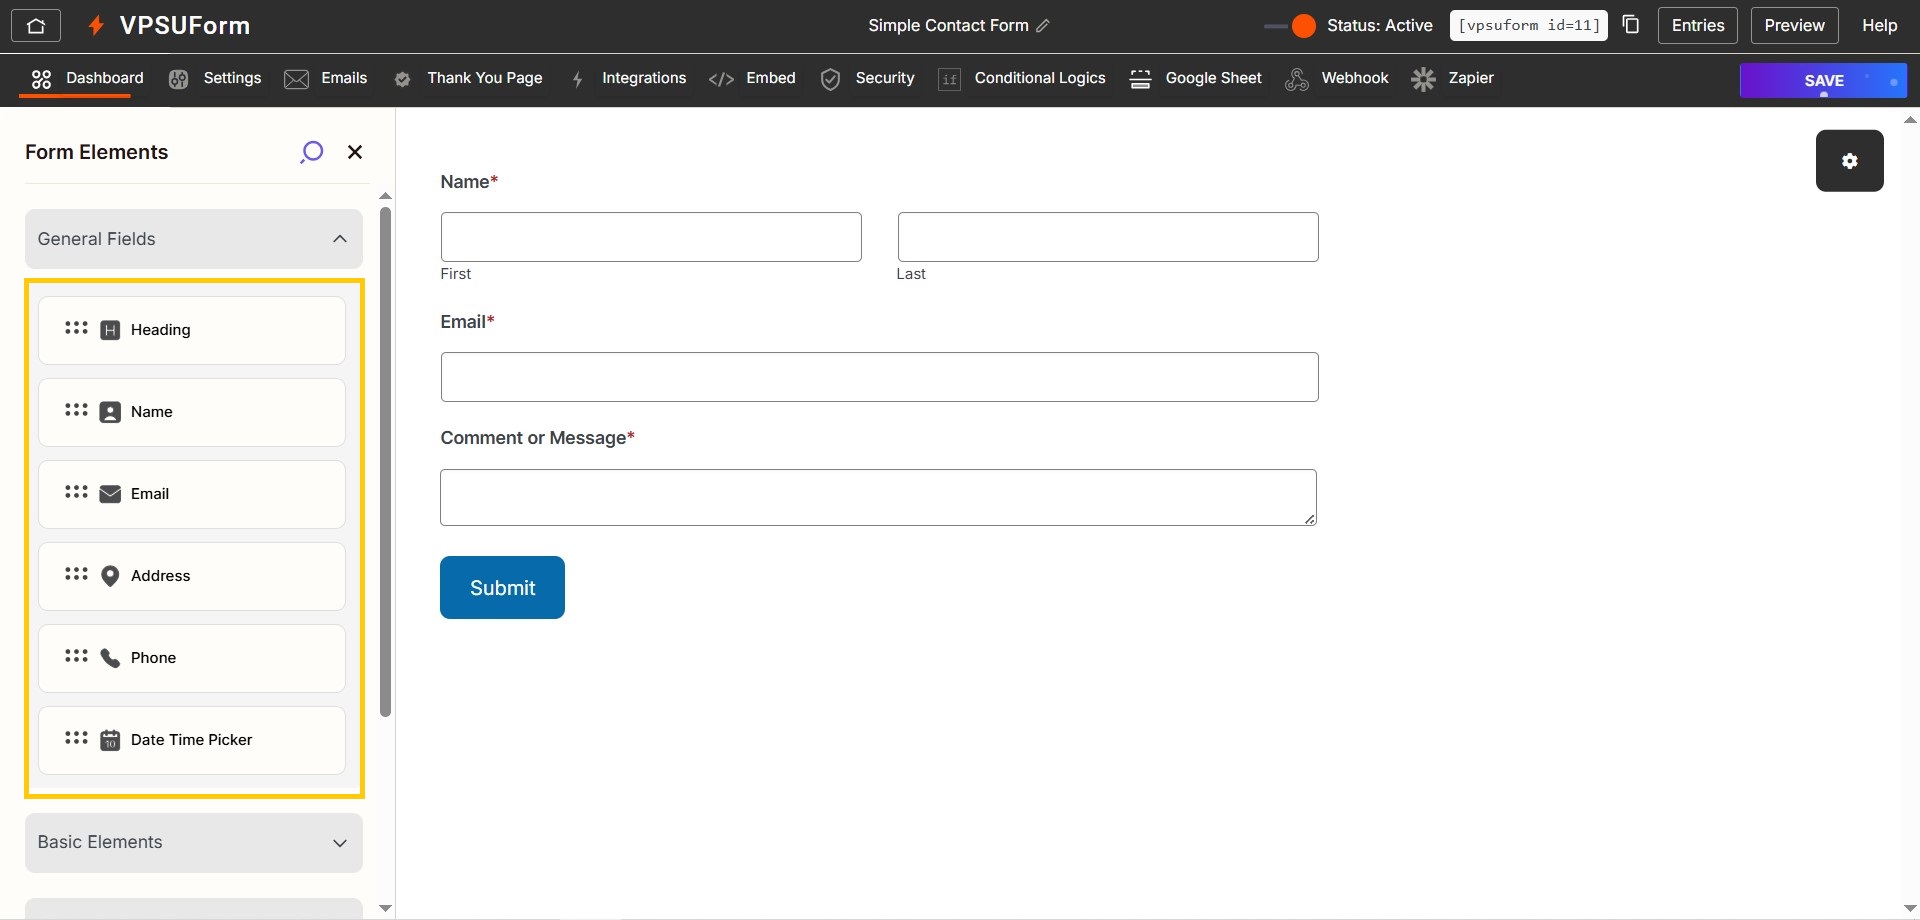
Add fields using drag & drop
-
Left panel shows field types (Text, Email, Textarea, File Upload, Dropdown, Radio, Checkbox, Date, etc.).
-
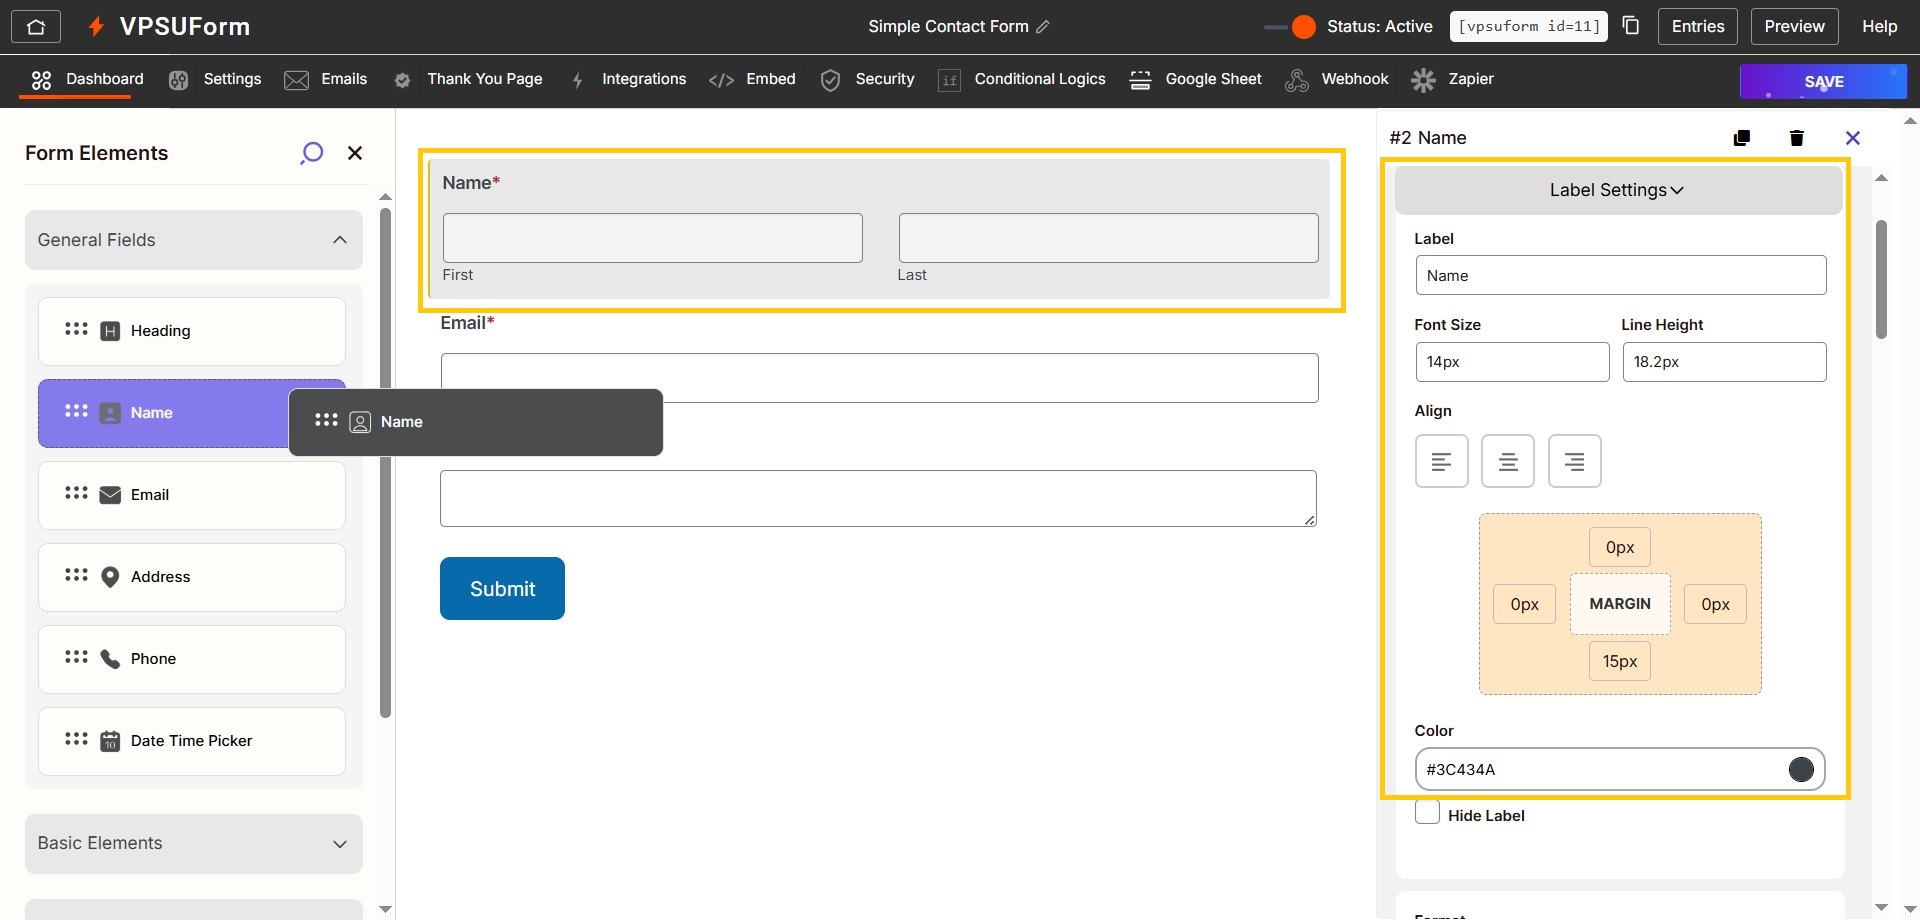
Drag Text into the canvas for “Full Name”. Click the field to edit settings:
-
Label:
Full Name -
Placeholder:
Enter your full name - Required: toggle On if mandatory
-
-
-
Add an Email field
-
Drag Email field. Set label to
Email Address. Map validation to email type and toggle Required.
-
-
Add File Upload (optional)
-
Drag File Upload
-
Settings: Allowed types
jpg,png,pdf,docx| Max size5MB | Multi-file Off/On 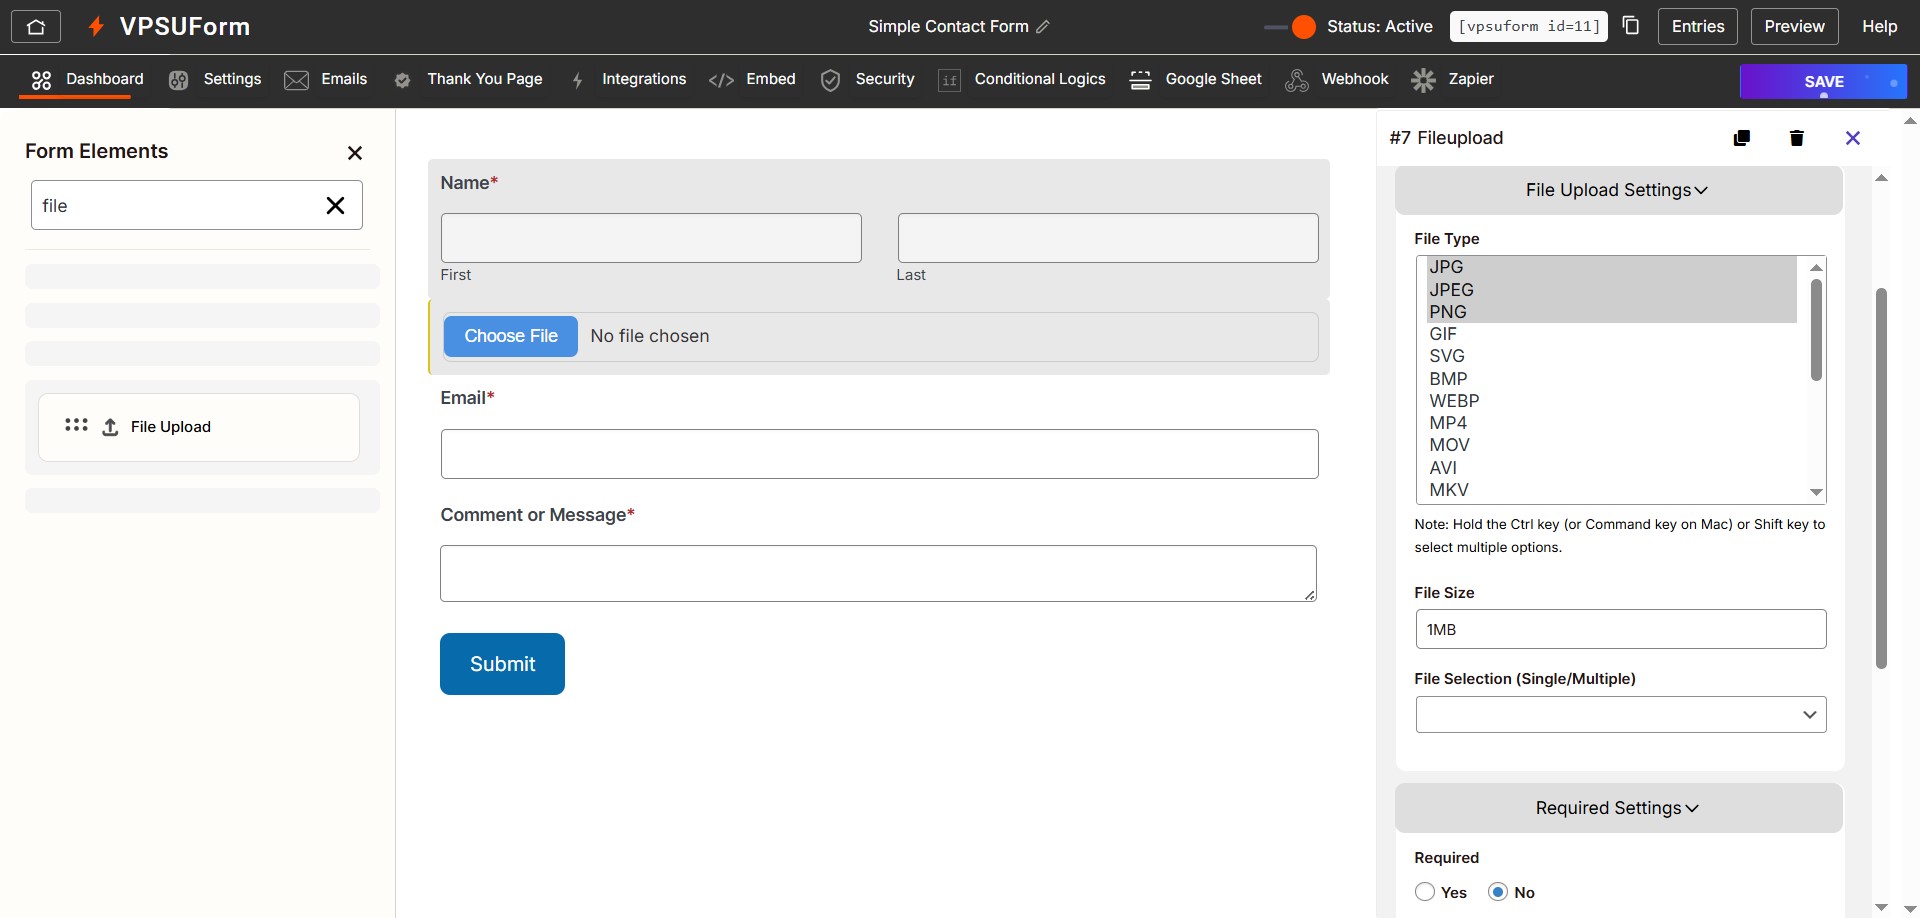
-
-
Submit button and confirmation
-
Change Submit button name if you want.
-
Open Thank you page → set Confirmation message or set redirect URL (e.g.
/thank-you/). 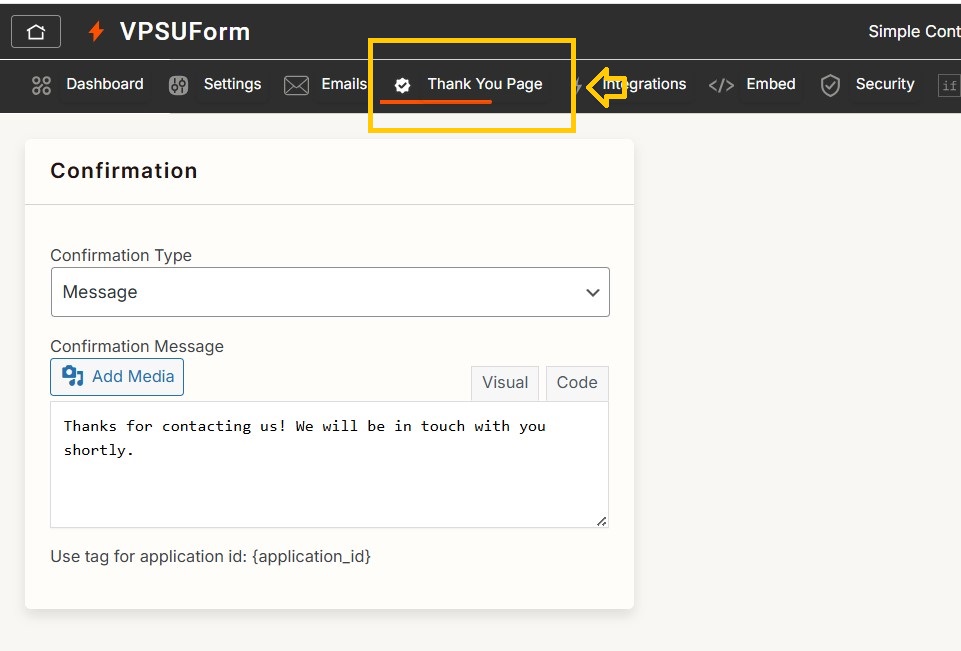
-
-
Save the form
-
Click Save Form (top/right). The system generates a shortcode like: [ vpsuform id=”123″ ]

-
-
Embed on a page
-
Create/Edit a Page → paste shortcode into Gutenberg block or page builder module → Publish/Update page.
-
-
Test the form
-
Visit the published page, submit a test entry, and verify:
-
Submission appears in VPSUForm → Entries
-
If email configured, check inbox for notifications
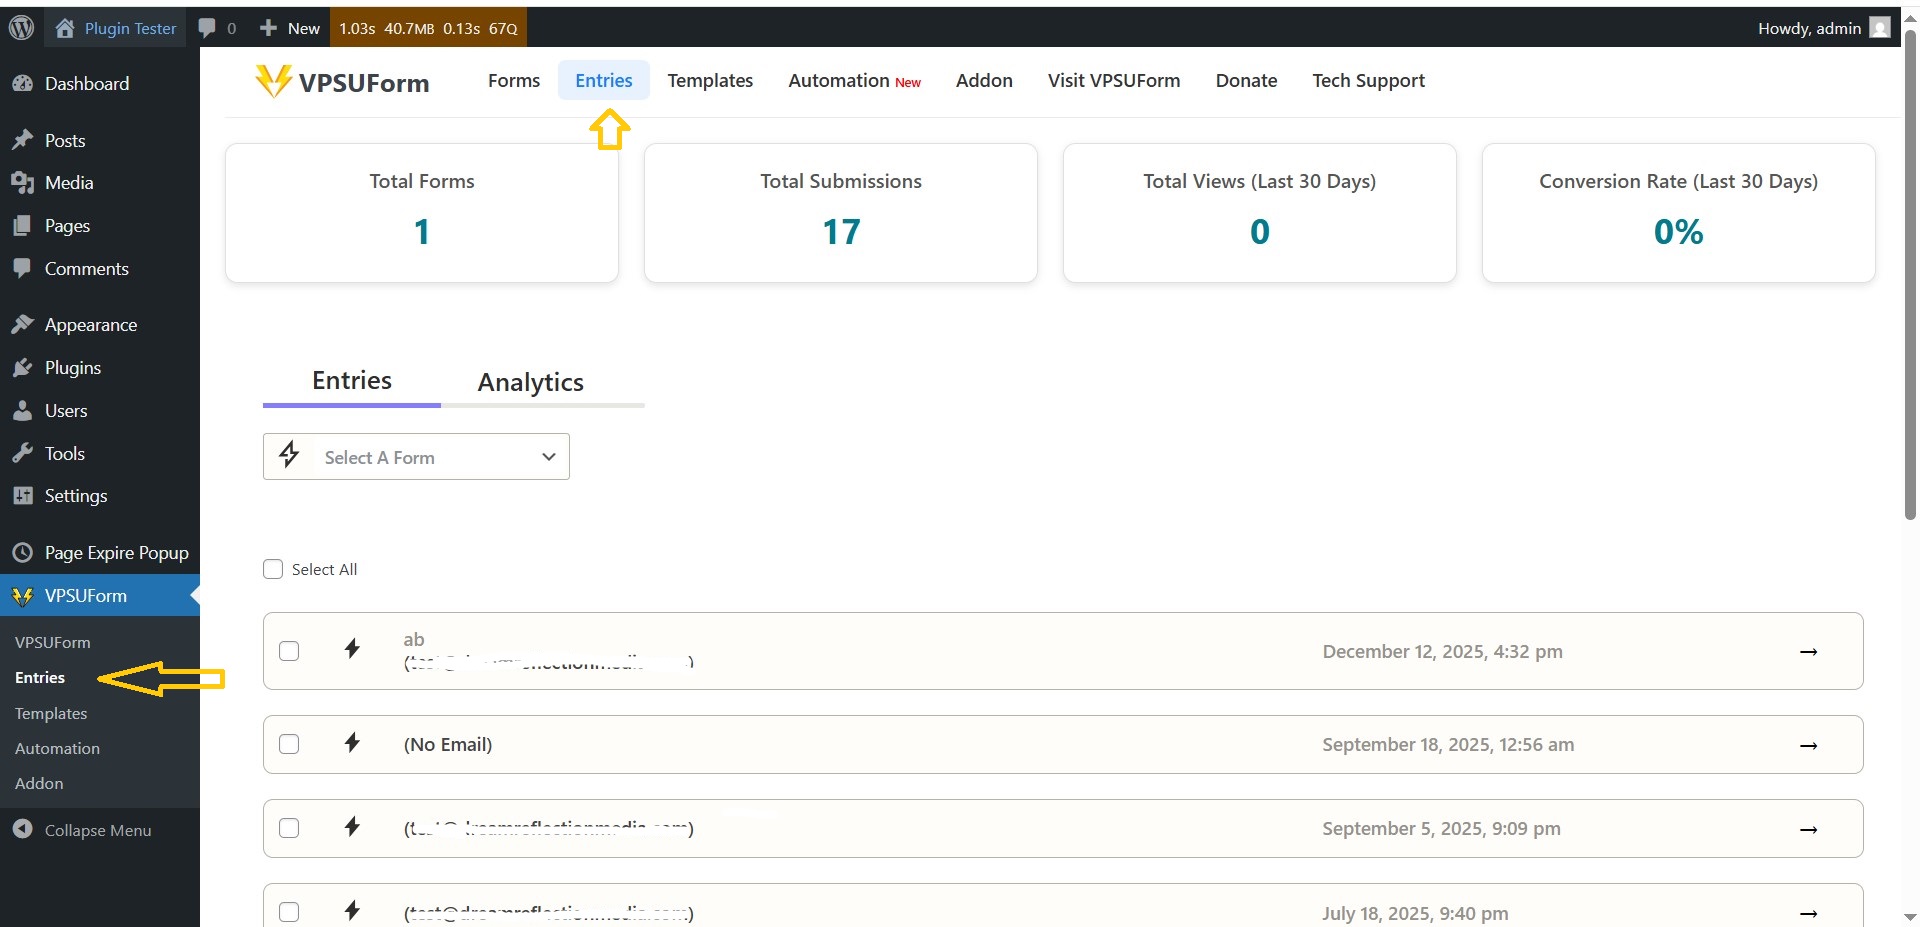
-
-
Troubleshooting
-
If the form doesn’t appear, confirm shortcode ID matches the form saved.
-
If fields not saving, try disabling caching plugin and save again.
————————————-
👉 Download it directly from WordPress.org
Get Involved or Get Help
Need support? Click here
Feature request? We’re all ears—VPSUForm is built for the community.
Love it? Leave a ⭐️ review on WordPress.org