In the digital age, your website’s forms are more than just “contact us” widgets — they’re conversion engines. A well-crafted form can turn a casual visitor into a lead, a subscriber, or even a paying customer. In this post, we’ll walk through the principles, techniques, and tools (like VPSUForm) to build forms that convert better — and how you can implement them step by step.
1. Why your forms often fail
Forms are deceptively simple — but many websites screw up their implementation. Some common pitfalls:
-
Too many fields — as the number of fields increases, the abandonment rate skyrockets.
-
Poor layout & mobile unfriendliness — if your form looks broken on phones, users will drop off.
-
Lack of trust or clarity — no GDPR consent, no explanation of privacy, no confirmation that the form “works.”
-
No logic or personalization — static forms that ask irrelevant questions frustrate users.
-
No feedback or follow-up — no autoresponders, no clear “thank you” page, no next-step guidance.
Fixing these weak points is how you convert more visitors into leads.
2. Principles of high-conversion forms
Here are some best practices grounded in UX and psychology:
| Principle | Why It Matters | Implementation Tip |
|---|---|---|
| Simplicity & minimalism | Users are impatient. Fewer fields → less friction. | Ask only what you absolutely need; use conditional logic to show extra fields only when relevant. |
| Progressive disclosure / multi-step forms | Breaking a long form into steps feels less daunting. | Split into 2–3 panes (e.g. “Personal Info → Preferences → Submission”) |
| Smart defaults & pre-filled data | Reduces effort and errors | Use known user metadata (if logged in) or browser data to prefill name, email |
| Clear labels & placeholder text | Prevent confusion | Use descriptive labels (“Business Email” vs just “Email”) and supportive placeholders |
| Real-time validation & feedback | Helps user correct errors immediately | Show inline errors (e.g. “Please enter valid email”) instead of waiting until form submit |
| Trust indicators | Reduces anxiety over giving information | Display “we don’t share your data,” use SSL lock icon, GDPR checkboxes |
| Thank you page + next step | Keeps momentum | After submission, show confirmation + optional upsell or next action (download, visit page) |
| Test & iterate | Even well-designed forms can be optimized | A/B test button text, layout, field order, form length |
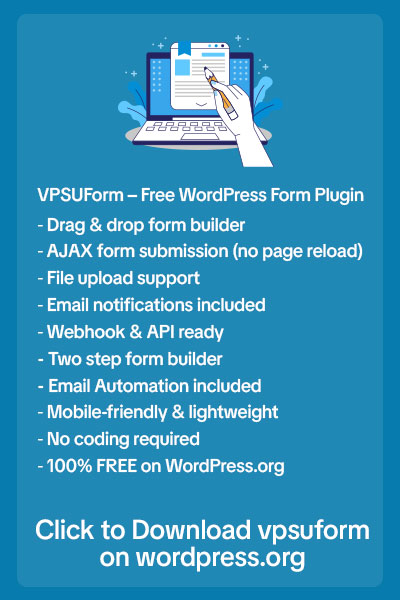
3. How VPSUForm helps you build high-conversion forms
VPSUForm is designed with these principles in mind. Here’s how it supports your goals:
-
Drag-and-drop builder + live preview — you see what the user sees, and changes are instant. (from site: “Drag & Drop … Live Preview”) vpsuform.info
-
30+ field types + conditional logic — only show relevant fields to the user based on their input. vpsuform.info
-
Multi-step / paginated forms — break long forms into steps for better user flow. vpsuform.info
-
Smart pre-filled fields & dynamic merge tags — reduce user effort by pre-populating known data. vpsuform.info
-
Notifications, autoresponders & routing — respond instantly and send data where it needs to go. vpsuform.info
-
Spam protection (reCAPTCHA, honeypot, IP blocking) — keep your form submissions clean. vpsuform.info
-
Entry management & analytics — track views, submissions, and conversion rates within WordPress dashboard. vpsuform.info
-
Integrations & automation (Zapier, Google Sheets, Webhooks) — connect with your CRM, marketing stack, or custom workflow. vpsuform.info
In short: VPSUForm gives you the flexibility and power to build forms that behave intelligently — the kind users want to fill out and that marketers love to capture data from.
4. Step-by-step: Build a lead-gen form that converts
Here’s a sample workflow you can follow using VPSUForm:
-
Plan your goal & fields
Decide your form’s goal (e.g. “collect email + interest area”). Start with a minimal set of fields (Name, Email, Interest). Additional fields can appear conditionally (e.g. “What’s your budget?” only if “I’m looking to hire”). -
Create the form in VPSUForm
-
Add fields via drag-and-drop.
-
Use conditional logic for branching.
-
Turn the form into a multi-step layout if it’s longer.
-
Set placeholders, labels, help text.
-
-
Set up notifications & autoresponders
-
Admin: send submission details to your team.
-
User: send thank-you email or next steps.
-
-
Add spam protection & validation
-
Enable reCAPTCHA or hCaptcha.
-
Use inline validation messages.
-
-
Embed the form & test it
-
Embed on landing page, sidebar, or use popup/inline form.
-
Test on desktop / mobile. Submit test entries. Check that email, logic, and redirect behave correctly.
-
-
Measure & optimize
-
Use analytics (views, submissions, drop-off) to spot weak points.
-
A/B test: Button text (“Get My Quote” vs “Submit”), field order, form step count.
-
Review feedback and iterate regularly.
-
-
Follow up & nurture leads
-
Use integrations (Zapier, webhooks) to send the lead into your CRM or automations.
-
Send relevant follow-up emails or offers based on the user’s selections.
-
5. Advanced tips & tricks
-
Use progress indicators or breadcrumbs in multi-step forms so users know how far they are.
-
For long questionnaires, add a “Save & Continue Later” feature so users don’t lose progress.
-
On mobile, group certain fields (e.g. phone number + country code) to reduce scroll.
-
Use conditional email routing — if a user chooses “Support,” route to support email; if “Sales,” route to sales. VPSUForm supports this. vpsuform.info
-
Track conversion funnels within forms (view → start → submit) to diagnose drop-off steps.
-
For high-value forms (e.g. pricing quote), consider adding social proof or trust badges on the same page to reassure users before submission.
6. Real example (case study)
Here’s a hypothetical case:
Client: A digital agency wants to capture leads for web design.
Form goal: Collect Name, Email, Business Size, Website URL, Budget (if > ₹50,000).
Implementation with VPSUForm:
Step 1: Name + Email
Step 2: Business Size + Website URL
Step 3 (conditional): Budget only shows if user indicates they have a budget.
After submit: Autoresponder email with “Thanks for reaching out — expect our email within 24h,” and redirect to a “next steps” page.
Result: The agency sees a 25% increase in form submissions (because fewer users drop off), more qualified leads (thanks to conditional budget question), and better follow-up thanks to automation.
You can replicate this kind of flow in your niche (consulting, SaaS, coaching, etc.) using VPSUForm.
7. Tips for writing your post for SEO & shareability
-
Use a strong headline, e.g. “How to Build High-Converting Forms in WordPress (Step-by-Step)”
-
Include screenshots or GIFs of VPSUForm in action (form builder, analytics, conditional logic).
-
Use internal links (to your “Documentation”, “Addons”, “Blog”) to improve SEO.
-
Include real user quotes or testimonials (you already have some on your home page). vpsuform.info
-
End with a call-to-action: “Try VPSUForm for free”, “Download our free template pack”, or “Contact us for custom form help.”